
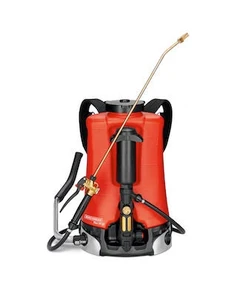
How to Clean a Backpack Sprayer
Posted by Andrew Greess on Jan 27, 2022
Every day you're out on a spray job, you rely on your backpack sprayer to get the job done. If it isn't clean, or if any of its parts aren't working properly, you risk a botched application and a lot of wasted time and money. Many pest control and weed control professionals don't clean their backpack sprayers often enough or thoroughly enough.
Fortunately, keeping your backpack sprayer clean isn't difficult. Here's how to clean a backpack sprayer quickly and properly.
1. Rinse After Every Job
The most important habit is the simplest: never leave chemical sitting in your sprayer. At the end of every job, empty the tank, add a few gallons of clean water, and spray it out through the wand. Chemical left in the tank, hose, or wand can dry, crystallize, and eat away at seals and O-rings. Always rinse thoroughly before switching to a different product to avoid cross-contamination, and dispose of rinse water according to the product label.
2. Empty the Tank and Inspect for Debris
Periodically, empty the tank completely and look inside for debris, residue, or buildup. If there's significant residue, scrub the inside with a soft brush and rinse thoroughly. This is also a good time to clean debris out of your spray equipment and check the hose for clogs, cracks, or kinks.
3. Clean the Check Valve
On manual pump sprayers, remove the check valve and look for chemical buildup. If there is any, clean it with a small brush and warm, soapy water, then rinse it well under running water so no soap residue goes back into the sprayer. A dirty check valve is one of the most common reasons a sprayer won't build pressure.
4. Clean the Wand, Trigger, and Spray Tip
The handle, trigger, and spray tip collect gunk over months of use. If you see buildup, take these parts apart and clean them separately with a small brush. Soak the spray tip in warm, soapy water or mild vinegar, and never clear a clogged tip with a pin or wire, because that damages the orifice and changes the spray pattern. Reassemble everything and test the sprayer with clean water.
5. Check and Clean the Filters
Filters in the lid, the tank outlet, and the wand handle keep debris away from your pump and tip. When they clog, pressure and output drop. Remove them, rinse them under water, and replace any that are torn or worn out.
6. Battery Sprayers Need a Little Extra Care
For battery backpack sprayers like FlowZone and the Birchmeier REC 15, remove the battery before cleaning and keep water away from the battery compartment and contacts. Run clean water through the pump by spraying it out, rather than submerging any part of the unit. Store the battery charged and out of extreme heat.
7. Train Your Techs to Clean Equipment Regularly
Make cleaning and inspection part of every technician's routine, not something that happens only when a sprayer breaks. Techs should know the basic maintenance steps to avoid costly downtime, and supervisors should spot-check equipment to make sure it's getting done. Read more about why equipment maintenance matters.
8. Do Annual Preventative Maintenance
Once a year, give each sprayer a full going-over: clean every part, replace worn seals and O-rings, and swap out anything that's cracked or tired. See our annual maintenance suggestions. A repair kit on hand makes it a quick job.
Parts and Help
We stock replacement parts for the backpack sprayers we sell, including Birchmeier parts and FlowZone parts and batteries. If it's time for a new sprayer, compare models on our backpack sprayers page. Questions? Contact us or call 602-371-1993.